You may be wondering what is a digital work flow? and Do I need one? Well let me answer the second question and that is YES!
Basically a digital workflow are all the things you do after you capture an image. I find having a consistent workflow makes it easy to process all my images.
So on a shoot these are all the main steps I take:
Image Capture
Capturing images in the highest resolution possible. I always have my camera set to RAW but if your camera doesn’t capture RAW, be sure to capture the images in the highest JPEG possible. Make sure you invest in at least 2 digital memory cards. You never want to run out of space when capturing those special moments.
Backup
I always back up my images to our desktop computer, followed by a backup to an external hard drive, followed by back up to cloud storage. One of my favorite online cloud storage is MediaFire, with 10GB free and very reasonable priced plans.
Lightroom Integration
At this point I like to begin an addition of files into my Lightroom Catalog from the downloaded images. If you don’t know what I am talking about here don’t worry. The following TTL Tuesday will address Starting off with Lightroom . I do not recommend creating a bunch of catalogs, currently I only have 2 catalogs. One for all my personal photos and one for clients. When you integrate your photos into Lightroom you are able to apply basic metadata such as copyright, tags and keywords.
White Balance Corrections
This can easily be done with one quick move across a bunch of images if you forgot to adjust it or applied to individually.
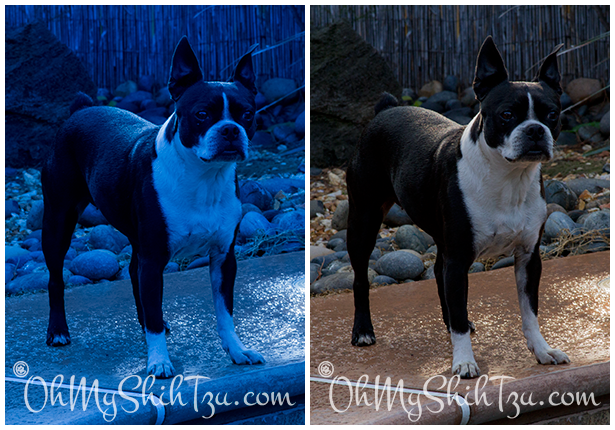
The photograph on the left displays a very bad white balance, with the correction on the right. As it turned out I had not changed the settings while I was shooting inside the house. Since my white balance was set inside the house on Tungsten lighting, it resulted in my image taking on a nasty blue effect. Yuck! But in a quick fix I was able to correct the image with the correct white balance of a cloudy sky.
Exposure Corrections
Setting of black and white points and reading the histogram. Make sure that yours highlights aren’t blown out and there is texture and definition in shadows.
Yup… this happens sometimes. Luckily I was able to save this photo, though I never had planned to show it since Katie’s eyes are closed!!
If you have no idea on how I made these simple changes, don’t worry, we will be reviewing the simple techniques to make your photos great in the upcoming weeks.
Sharpen
All Photos can usually benefit from a little sharpening, just remember not to over do it. Remember when you are sharpening to view your image at 50% of actual size.
The next couple of steps really depend on how far you want to go creatively in your work:
- Make a duplicate image to being working creatively
- Retouching & enhancements. At this point I open the image in Photoshop and I let the fun begin using filter s, layers, the blend mode and much more!
- Crop & Resize – I like to make sure I resize images for the web at 100 dpi. You may have seen other sites say to use 96. It’s up to you what you like to use.
- Back-up – I now back up a full resolution version and the web version.
- Output – If you are still with me by now, you have probably figured out I use the word ‘images’. At this point it still is an image. It becomes a photography, a tangible object, when I print it! Have you forgotten how it feels to look through a photo album? Don’t lock away your images in a computer to never be seen again!!
Next month please join us on the 2nd and 4th Sunday for special installments of Through The Lens Tuesday – Sunday Editions. For the month of April I am participating in the month-long A to Z Challenge, 26 days of blogging from A to Z and will be sticking to a Doggie Theme.


Enjoyed the post and found the information useful. I work with Photo shop alot but basically taught myself so I’m always looking for tips on this subject!
Stacey recently posted…Spring Sunday at Home